

Order listing
Browse, search, and update orders — every order in your store on a single page
The order listing is the central place for working with orders. The page shows all your orders newest first, lets you change their status, search for individual orders, and open an order's full details. You'll find it at the top-bar Orders link in the dashboard.
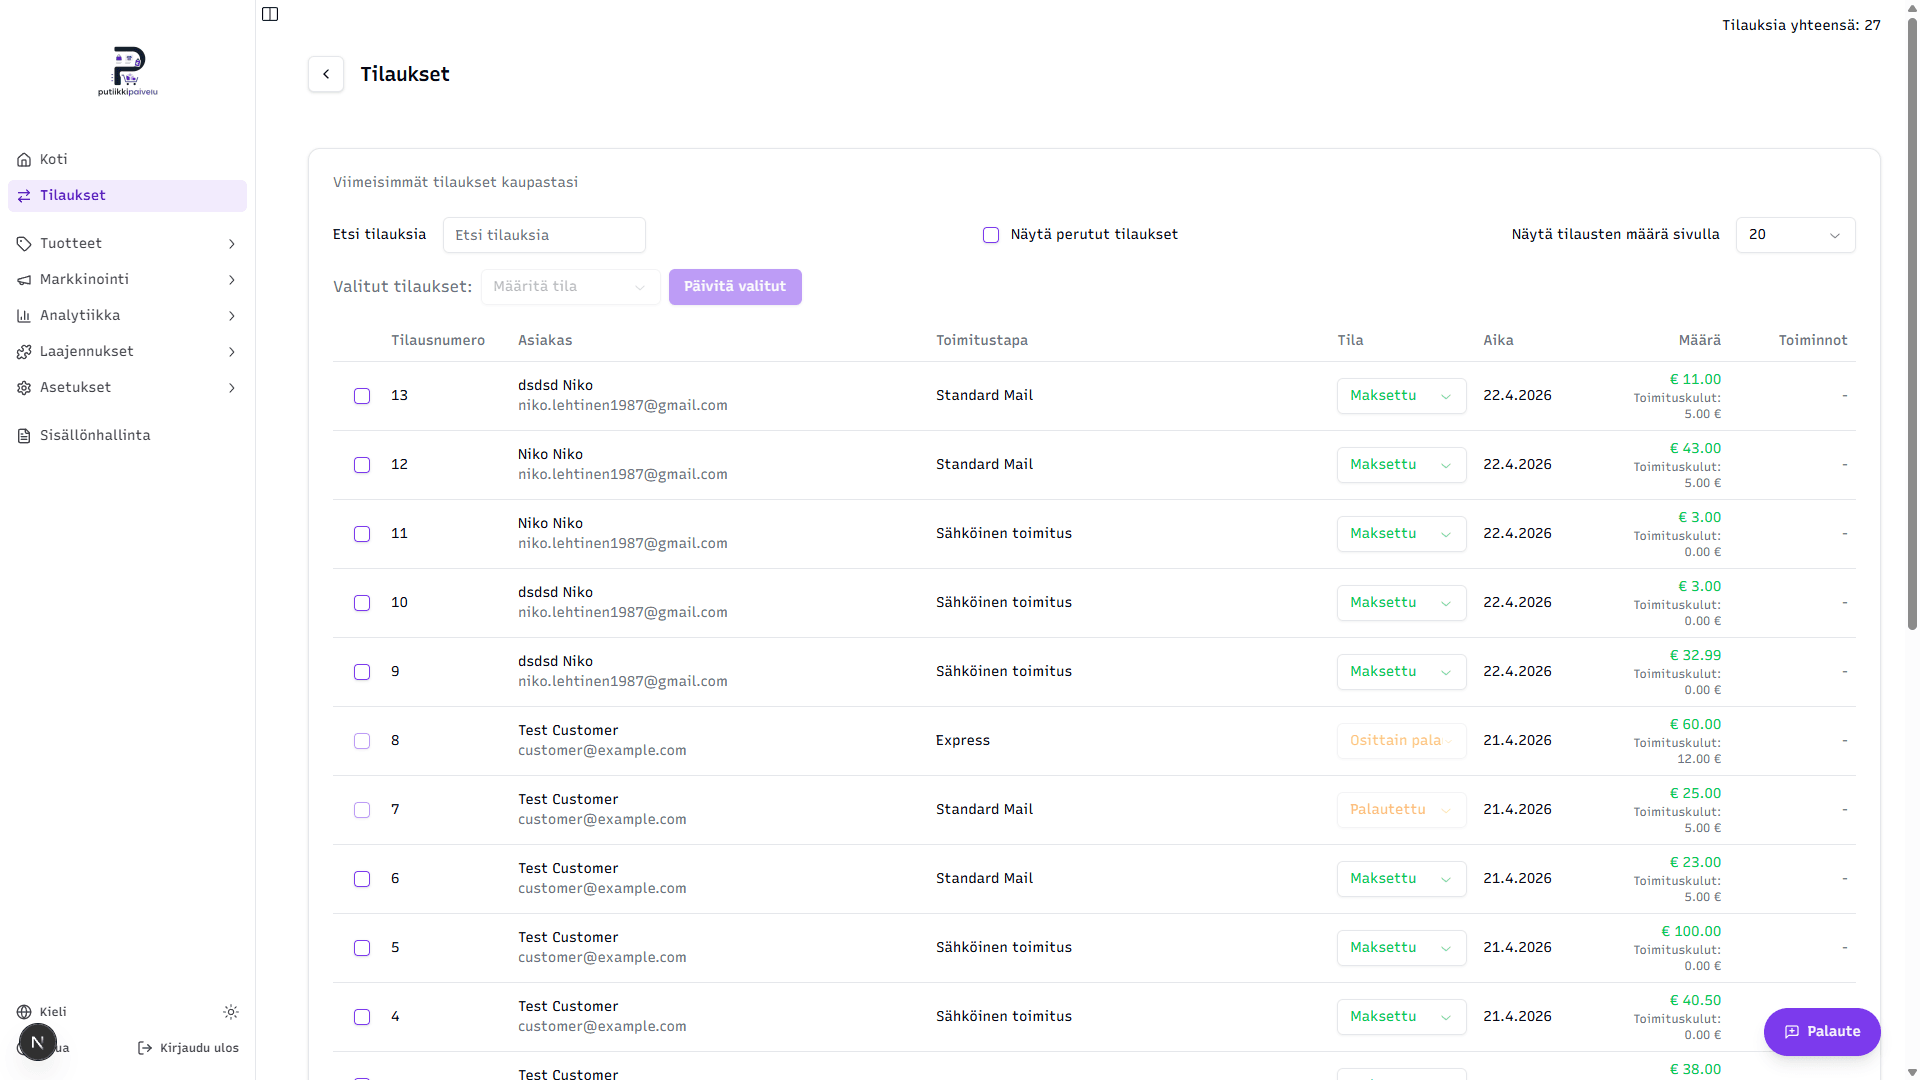
Page layout
The top of the page has three sections:
- Title and total count — the page heading Orders and the Total orders: N counter in the top-right corner. The count updates as you search or toggle the cancelled-orders checkbox.
- Filter row — search field on the left, "Show cancelled orders" checkbox in the middle, and "Orders per page" selector on the right (20 / 50 / 100).
- Bulk update row — "Selected orders" label, a status dropdown, and an "Update selected" button. Activates only after you tick rows in the table.
The table has one row per order with these columns:
| Column | Contents |
|---|---|
| Checkbox | Used for bulk updates — see below |
| Order number | The running number in your store (e.g. 13) |
| Customer | Name and email — the whole row is a link to the order details |
| Shipment method | The method chosen on this order (e.g. Standard Mail, Digital delivery) |
| Status | The current status — also the change dropdown |
| Date | Order creation date |
| Amount | Total after discounts, with shipping cost shown separately below |
| Actions | Create shipment and download the freight document — only on Shipit shipments |
Orders are sorted newest first; the order can't be changed.
The customer name is a link
Click the customer name or email to open the order details page, where you'll see line items, refunds, the shipment, and every other detail.
Changing a single order's status
The dropdown in the Status column lets you change one order's status straight from the listing — no need to open the row first.
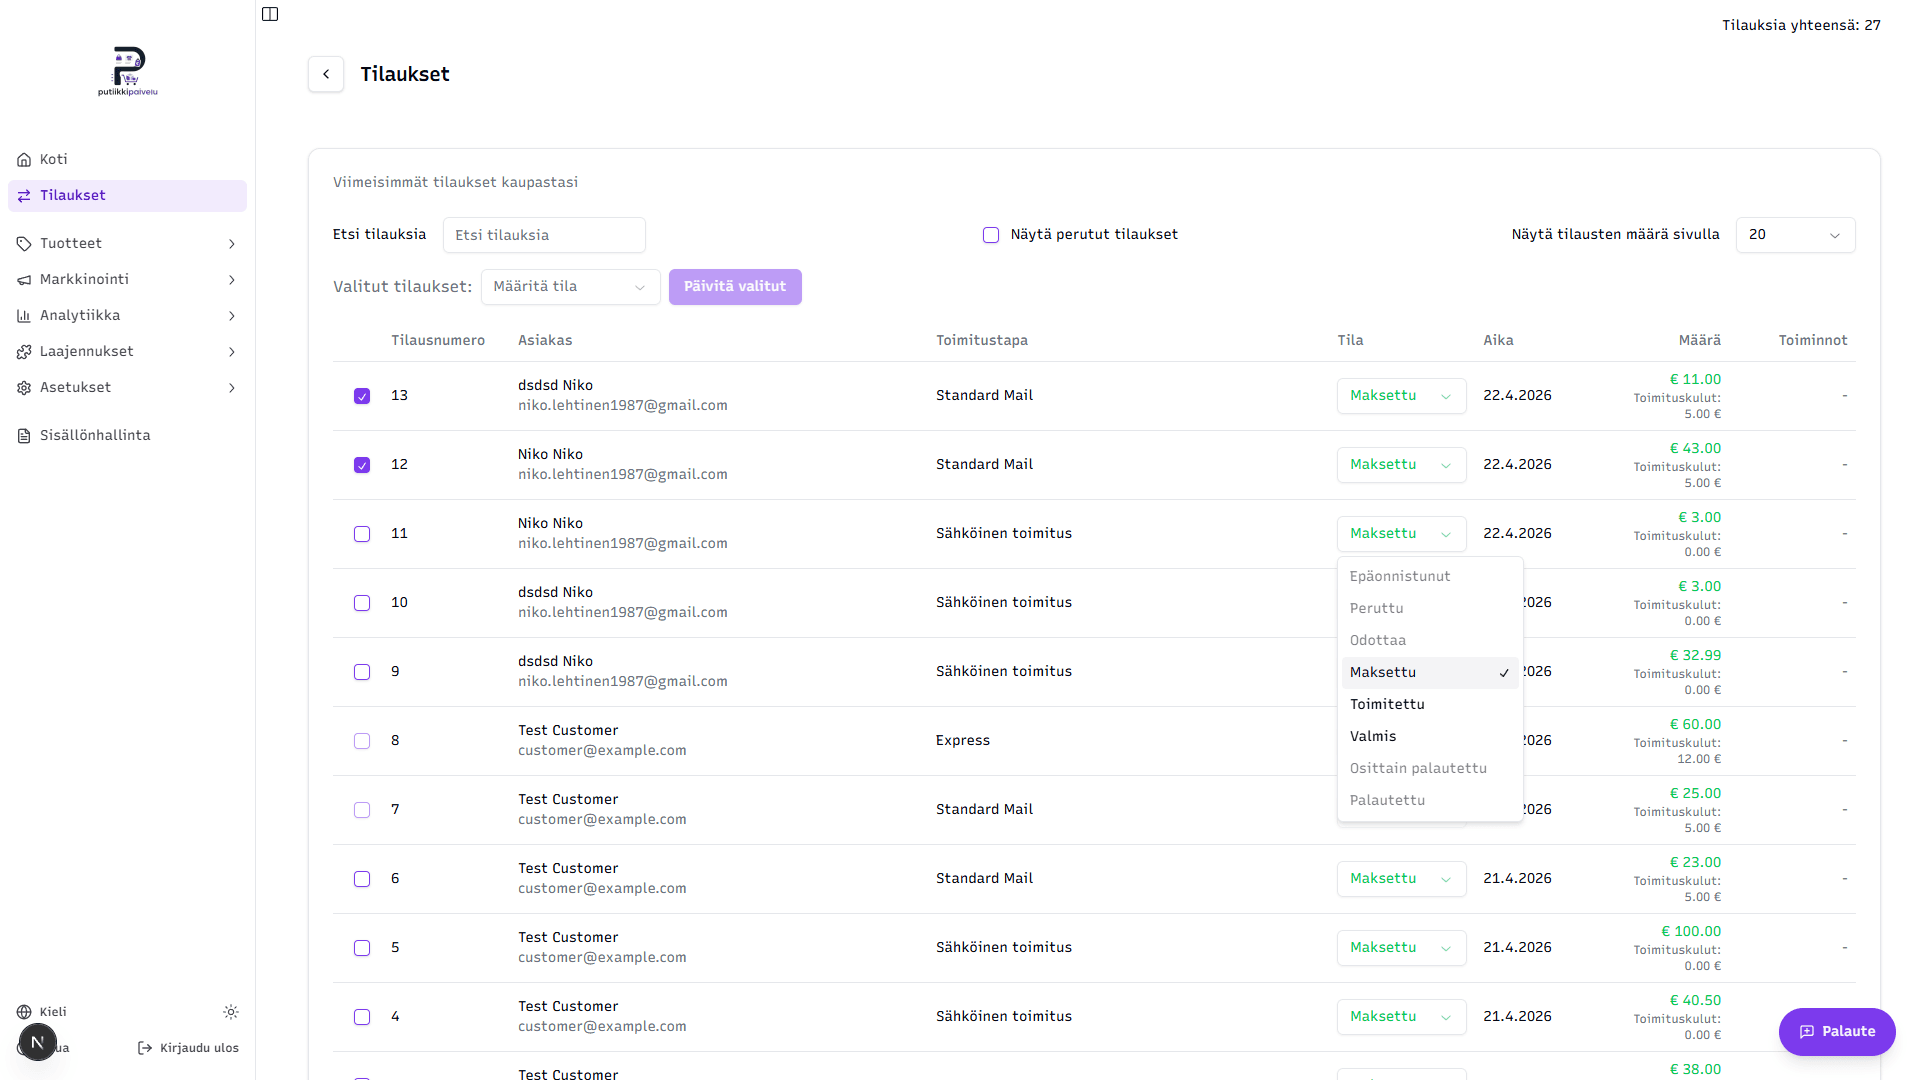
The dropdown shows every possible status, but only three are clickable:
- Paid — the customer has paid but the parcel hasn't shipped yet
- Shipped — the parcel is on its way
- Completed — the order has been delivered and signed off
The rest are grayed out and can't be picked manually:
- Failed and Cancelled — set automatically if payment fails or the customer cancels
- Pending — the early-state status before the payment is confirmed
- Partially refunded and Refunded — set automatically when you refund money on the order details page
When you pick a new status, the system saves it instantly and shows a confirmation toast. Statuses are color-coded:
| Status | Color |
|---|---|
| Paid | light green |
| Completed | dark green |
| Shipped | blue |
| Pending | yellow |
| Failed, Cancelled | red |
| Partially refunded | light orange |
| Refunded | orange |
Refunded orders can no longer be edited
Once an order is Partially refunded or Refunded, both the status dropdown and the row's checkbox lock. Refunded orders can't have their status changed manually, because that would mess with the bookkeeping.
Bulk update — change several orders at once
When you've just dropped a batch of parcels at the post office, you don't want to open each order one by one. Use the bulk update:
- Select orders — tick the checkboxes on the left of the rows you want.
- Pick a new status — from the "Selected orders" dropdown at the top. The options are Paid, Shipped and Completed — the same three you can pick one by one.
- Click "Update selected" — every selected order updates to the same status at once, and the selection clears automatically.
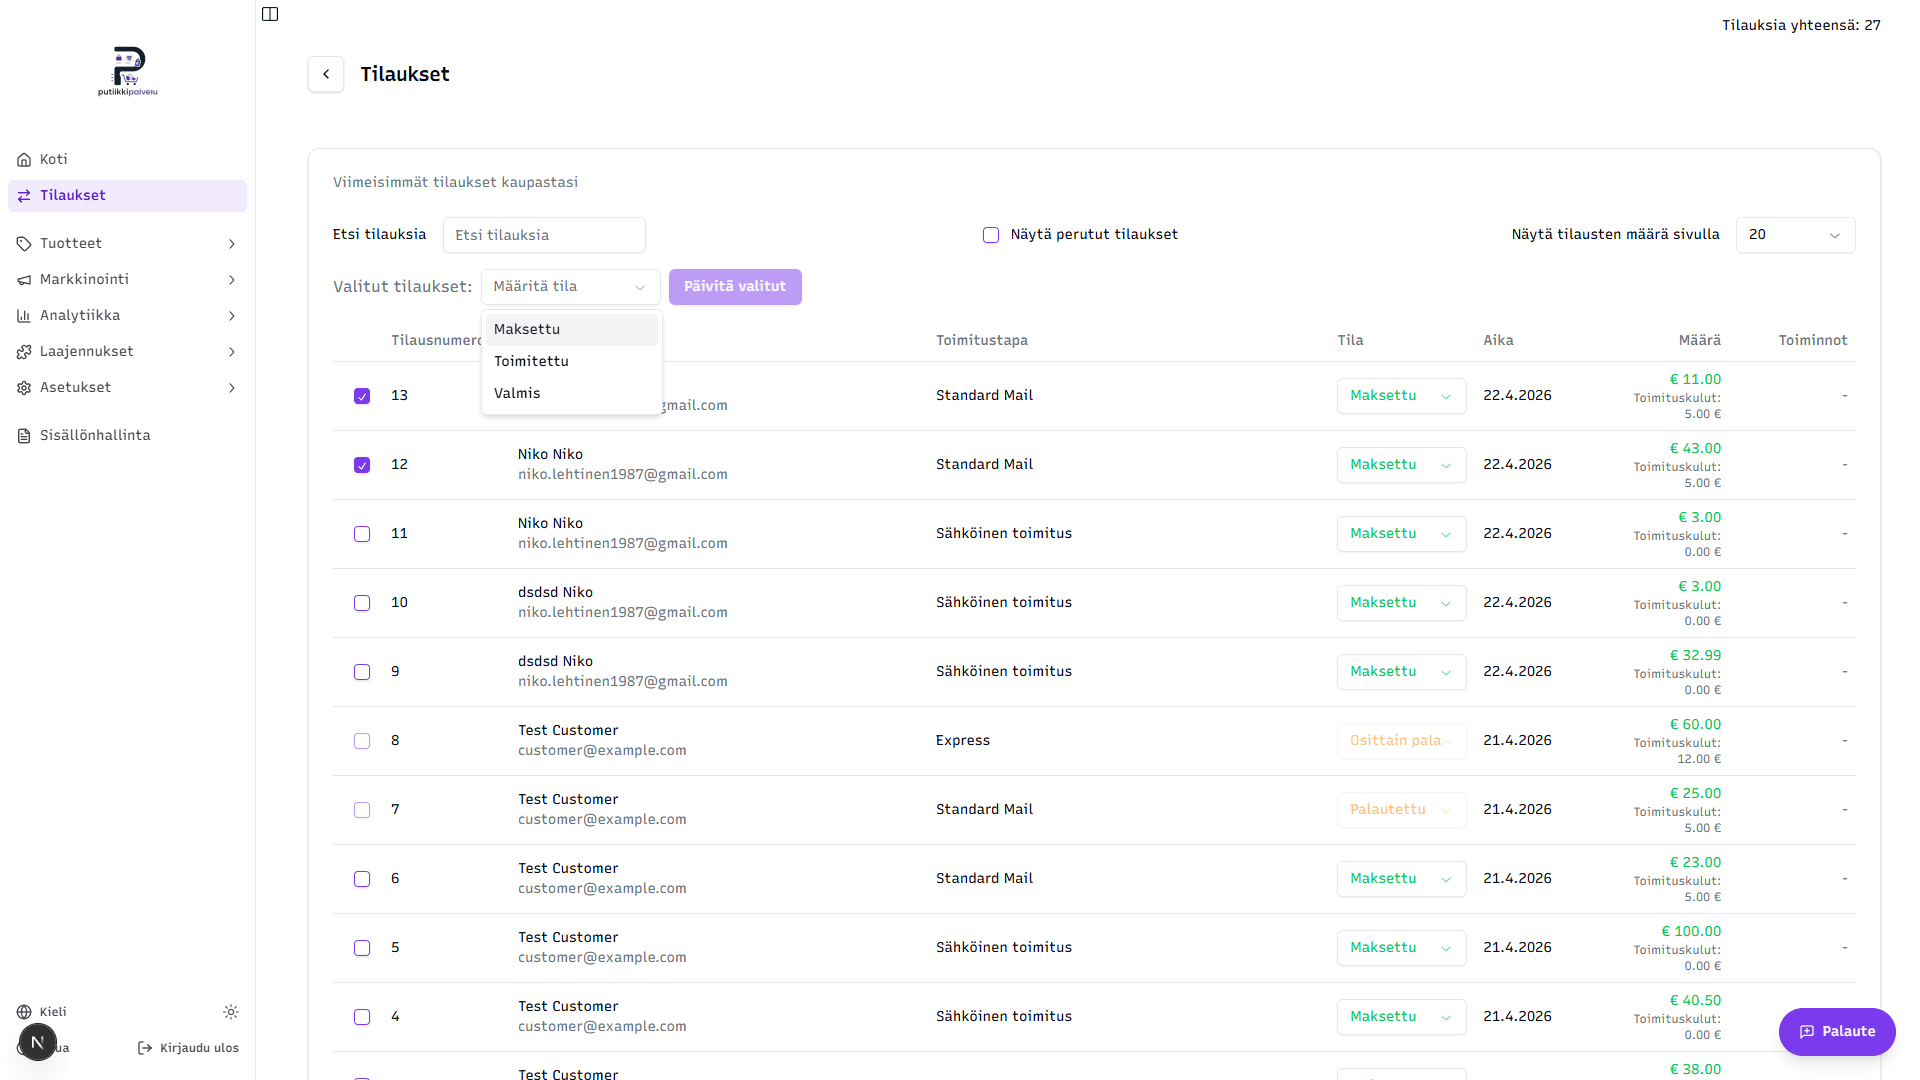
The button stays disabled until you've selected at least one order and picked a status from the dropdown.
Refunded rows can't be selected
If a row's status is Partially refunded or Refunded, its checkbox is locked — there's no way to accidentally change a refunded order's status with a bulk update.
Searching orders
The search field looks across multiple fields at the same time. Type into the field, and the page filters automatically about a second after you stop typing — no need to press Enter.
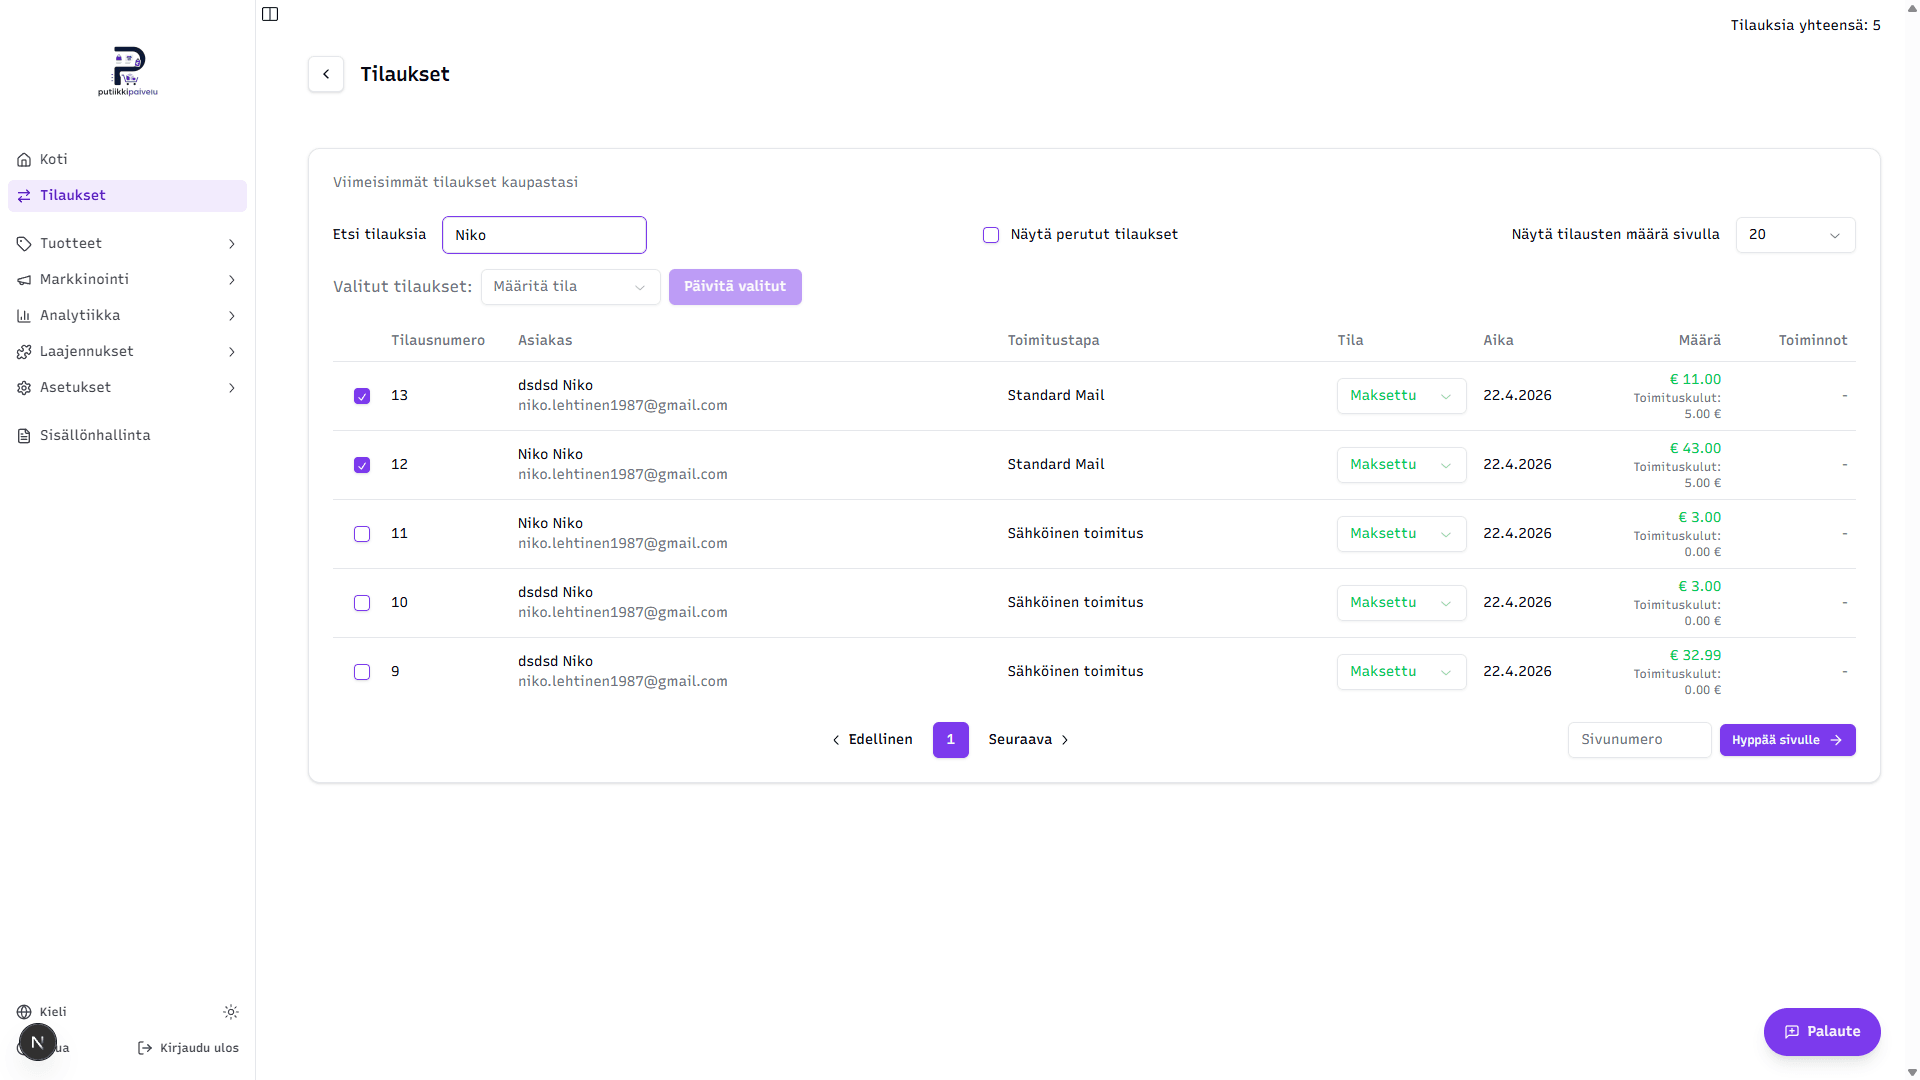
Search matches against:
- Order number — digits only, e.g. 13 finds order number 13
- Customer first or last name — e.g. Niko or Smith
- Customer email — e.g. gmail.com or the full address
- Order ID — the long internal identifier (mainly used in support cases)
You don't need to format the input — just type whatever you remember. Upper- and lowercase are treated the same.
Clear the field to reset
Emptying the search field brings every order back. The total count in the top-right corner tells you how many orders the search matched.
Show cancelled orders
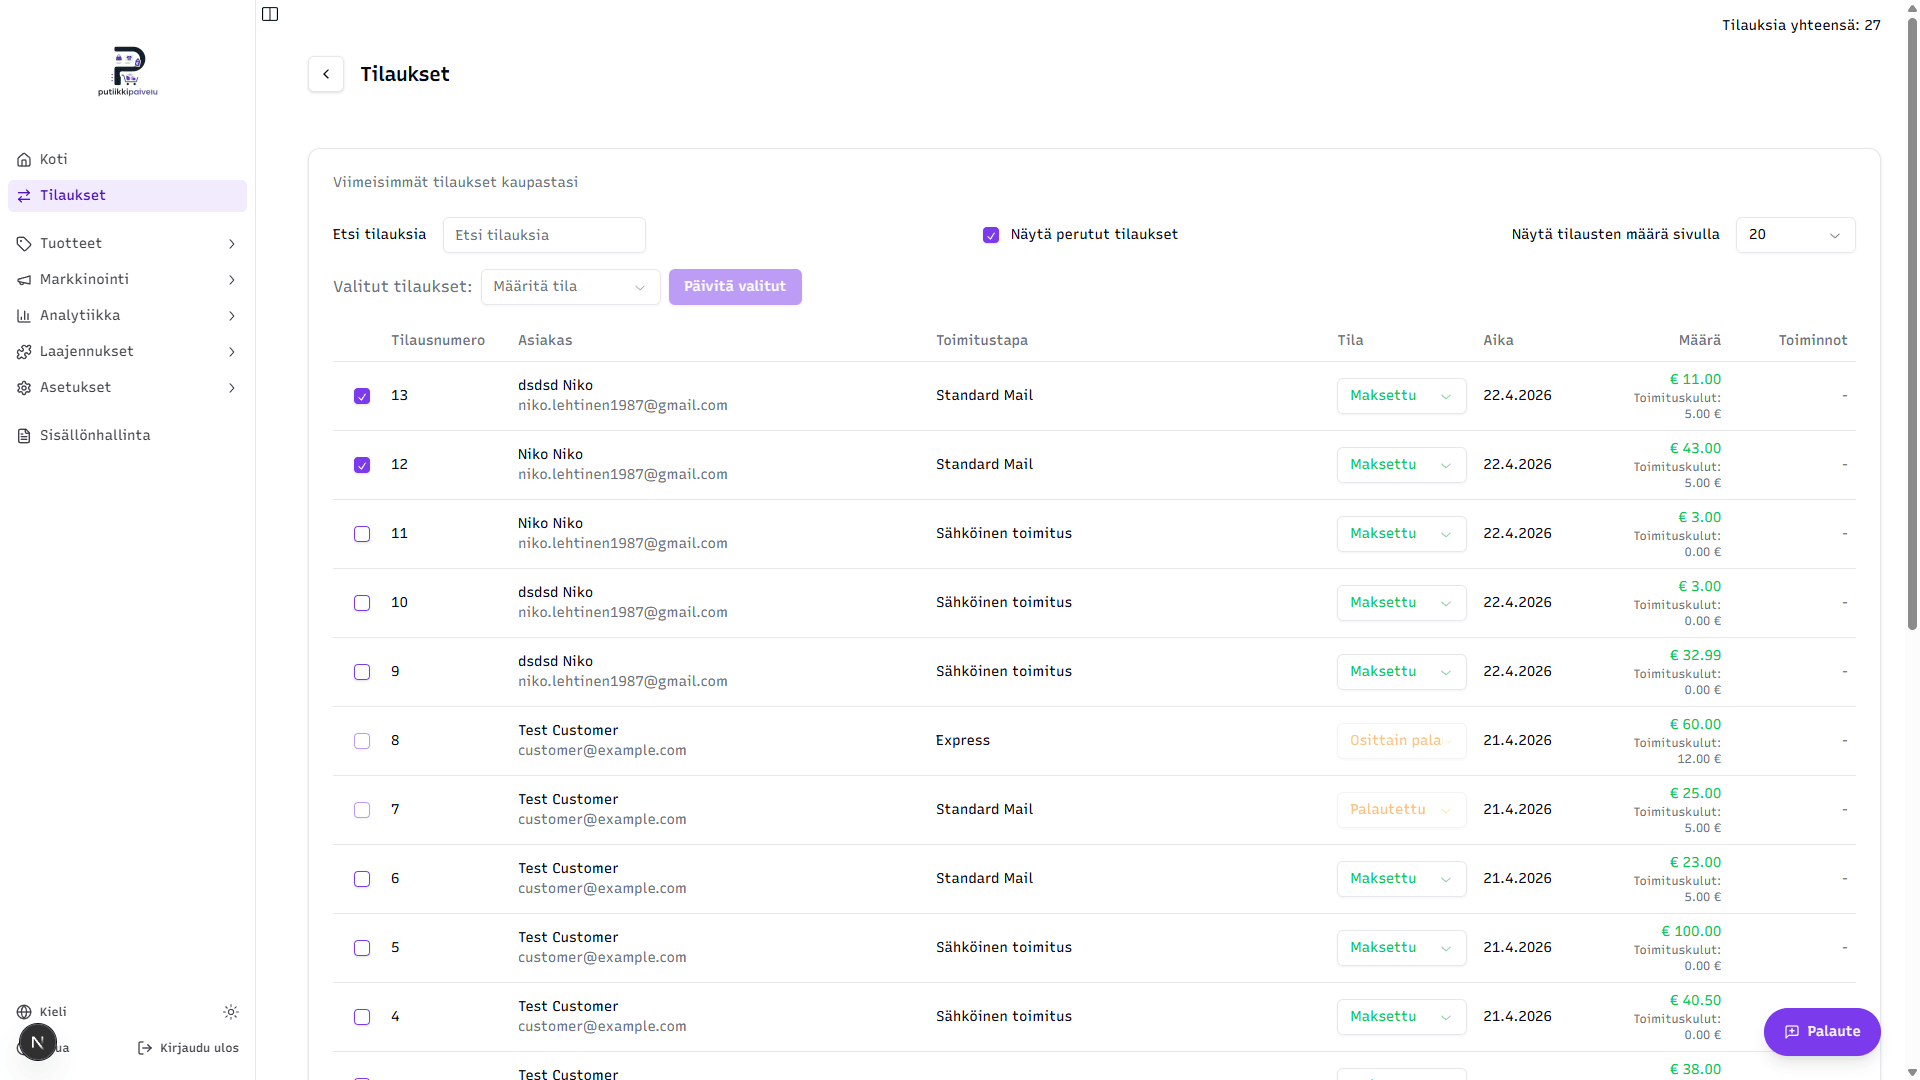
By default the listing only shows completed and paid orders — those with status Paid, Shipped, Completed, Partially refunded or Refunded.
Tick "Show cancelled orders" and the view also includes orders in Pending, Failed and Cancelled states.
What these orders actually are
Most of these aren't really "cancelled" in the sense that the customer placed an order and then changed their mind. They are abandoned checkout attempts:
- The customer reached the checkout and an order record was created, but they closed the tab before confirming payment
- The card was declined or the bank rejected the charge
- The customer hit Cancel on the payment page or navigated away
Rows like these show up as a normal part of running a store — it's just how customers behave. They appear here mainly so you can investigate things like why a particular order didn't go through, or whether an order is stuck in Pending. You can't change their status manually, but you can open them to see what the customer was trying to buy.
Abandoned carts are different
"Show cancelled orders" only includes orders where checkout was already started. Customers who left items in the cart without ever reaching checkout show up separately under Marketing → Abandoned carts.
Pagination and "orders per page"
The page loads 20 orders by default. For larger stores:
- Change "Orders per page" to 50 or 100 if you want to scan bigger batches at once.
- The bottom of the page has a pagination bar (Previous / 1 / 2 / Next). The Jump-to-page input on the right lets you go directly to a specific page.
Searching or toggling cancelled-orders resets the page back to 1 so the matches show up immediately.
Actions column
The last column shows a three-dot menu only on orders that use the Shipit integration as their shipment method. Other rows show "-". The menu's options depend on whether the method is set to create shipments automatically or manually — this is covered in detail in the Shipping section.
Related topics
- Order details — full guide to the individual order page